
Complete Instructions
Return to Stu's Internet Browser Launcher Home
Server-based Installation vs Standalone Installation:
Stu's Internet Browser Launcher can be installed in one of two ways:
Local Only (or Standalone) Install - This is normally performed at each computer from a floppy disk (i.e. download the Launcher from this website and extract it to a floppy disk before using). This type of installation is recommended where there is no server in your school, or if you'd like to use Stu's Internet Browser Launcher at home with dial-up Internet access. NOTE that there is no ability to stop Internet access using Stu's Internet Switch utility.
Server-based Install - By extracting the Launcher download to a shared path on your server and running the Setup program on each workstation from the shared server path, you can also use Stu's Internet Switch utility to turn on and off Internet access for all computers in your network.
Downloading the IELaunch.exe Program from this site:
The IELaunch.exe program is a self-extracting single file that creates the setup disk for Stu's Internet Browser Launcher. You can download this program from the previous page or by clicking here. As a starting point, you should download the file to your Desktop or to a downloads folder on your C: drive. Click the download link and choose the option to Save to Disk. Once downloaded, run the IELaunch.exe program to extract the installation files. The following screen will be displayed.
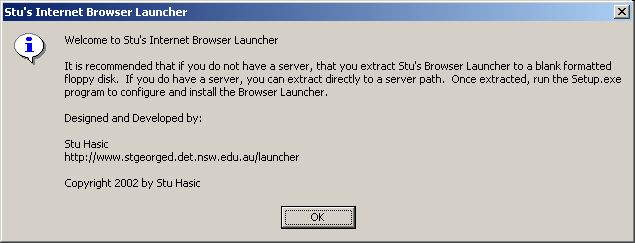
Read the message then click the OK button to continue. The following screen will be displayed.
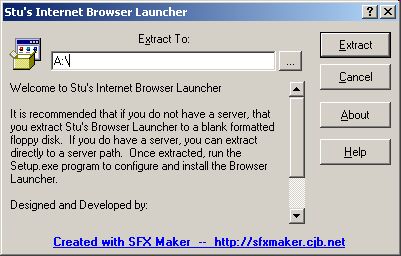
It's probably easiest regardless of your choice of installation type to extract the installation system to a floppy disk. You can then later simply copy the contents of the floppy disk to a shared folder on your server if you want to use a server-based installation. Place a blank, formatted floppy disk into the A: drive and click the Extract button to continue. Once complete, you should be shown an "Installation Successful" message.
Preparing for a Server-based Installation:
If you want to install the Launcher to each workstation from a server, you need to firstly prepare a shared folder from which to run the Launcher Setup program. Login as an administrator or equivalent to the server, create a folder called Internet within an area of your server where other shared applications run from and copy the contents of the Launcher diskette you made into the Internet folder. It is important that student logins have Read-only access to the Internet folder.
Running the Setup Program:
The Setup program must be run at each workstation you want the Launcher installed to. If you want a standalone (local) installation, run the Setup.exe program from your Launcher floppy disk. If you are running a Server-based installation, open My Computer or Network Neighbourhood and navigate to the shared folder where the Launcher installation files can be found and run the Setup.exe program. The following screen will be displayed:
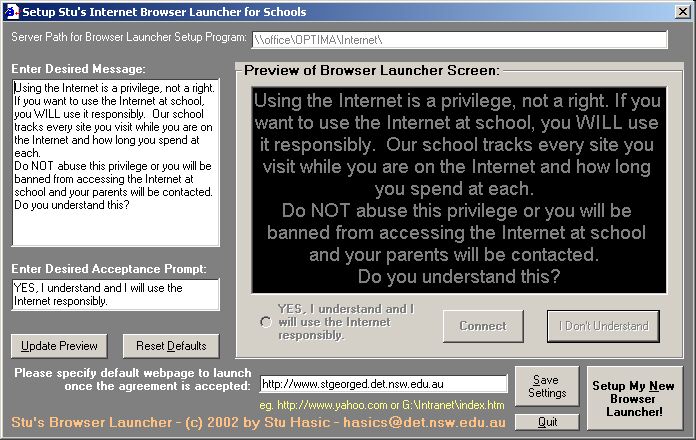
If you are running a Standalone Installation, the server path shown at the top will say *Not Available*. If you are running Setup.exe from a shared folder on a server, the full Universal Naming Convention (UNC) path will be displayed automatically and cannot be changed.
The Setup program allows you to customise the Browser Launcher message and the Acceptance prompt and specify the default webpage you want the Launcher to show when the browser is started. Changes can be made to the two large text fields on the left, then by clicking the "Update Preview" button, you can see how those changes will affect what students will see when they want to connect to the Internet. You can make as many changes as you like to the fields on the left and update the preview as many times as you like. There are default settings included in the Launcher Setup program, similar to the messages shown above, so if you wish to start again, click the "Reset Defaults" button.
When you are satisfied with the message and prompt you have set, it's a good idea to save these settings by clicking the "Save Settings" button. This will then set your preferences for these fields onto the Launcher floppy disk so future setups can be as simple as clicking the "Setup My New Browser Launcher" and all installations and messages will be the same. The next time you run Setup.exe, your saved messages will be shown. IMPORTANT NOTE: If you are running a Server-based installation, you can only Save Settings if you are logged in as Admininstrator or equivalent, therefore, the first time you run the Setup program, you should be logged on with write access to the server. This way, you can make changes to the default message and prompt and website URL (if needed) and save them. From there, when you run Setup.exe from the server using a student login, no changes to the message, prompt and default website can be made.
Installing Stu's Internet Browser Launcher to the workstation with the preferred settings is then simply a matter of clicking the "Setup My New Browser Launcher" button. You may be informed that your workstation needs an upgrade of the Windows Scripting Host - if this is the case, this upgrade will proceed and you will need to reboot then restart this Setup program. If there are no problems, the following window will be displayed:

Click the OK button and the Setup
program will close. On your desktop you will see a new icon that looks
like this: ![]()
This is Stu's Internet Browser Launcher. It looks just like the MS Internet Explorer icon, and as far as your students are concerned, it is. Once you have the Launcher icon on your desktop, it is EXTREMELY important that you DELETE all other Internet Explorer icons from your computer. There are usually a few Internet Explorer icons on the Windows interface. They can be deleted by clicking them once with the right-mouse button and clicking the option 'Delete'. You may be asked to confirm the deletion. Always choose 'Yes'.
You will normally find an Internet
Explorer ('blue e') icon on the Desktop, in the toolbar next to the Start
button ![]() and in the Start
menu...Programs option as shown in the example below:
and in the Start
menu...Programs option as shown in the example below:
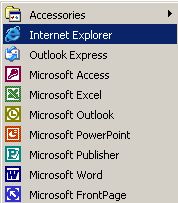
When you have deleted these these original Internet Explorer icons, you may want to replace the one in the toolbar next to the start menu with the new Launcher icon by dragging it with the right-mouse button to the toolbar and choosing "Copy Here". You may also want to place the Launcher icon into the Start menu...Programs list. This procedure must be repeated at each workstation. Once you have done all of this, whenever your students use the Internet Explorer icon, they'll see the following screen (with your customisations) before they can get onto the Internet.
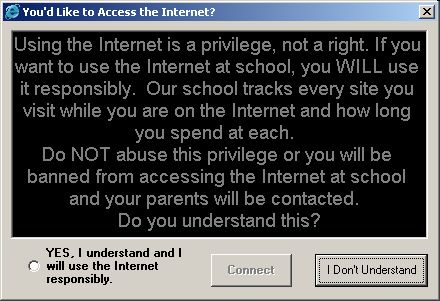
If they click on the agreement at the bottom of the screen then click the Connect button, they will be granted access to the Internet and the Internet Explorer browser will load and display your default start-up page as set in the preferences (actually, the default Internet browser will load, so if your school uses Netscape Communicator instead of Internet Explorer, then that browser will load). If they click the "I Don't Understand" button, the Launcher will close and they will be returned to the Desktop.
Obviously, there are ways to get around the Browser Launcher and access the Internet directly, but for most students, this Launcher process will be accepted and their agreement to use the Internet appropriately and responsibly will be reinforced every time they want to use it.
Stu's Internet On/Off Switch:
For schools that have set up a Server-based installation of the Browser Launcher, there is the added benefit of Stu's Internet On/Off Switch utility. This utility offers a quick way to tell the Browser Launcher on each workstation whether it's OK to use the Internet or not. If you need to access the Internet and ensure you have adequate bandwidth, the best way is to stop other workstations from starting Internet Explorer. Using the On/Off Switch utility will allow you to quickly block any new browsers from starting via the Browser Launcher - it will not stop anyone who has already started their browser. You may want to switch off Internet access at the end of the school day to stop people accessing the Internet after school or on the weekend. The On/Off Switch utility can help with this.
The Internet On/Off Switch utility
is accessed from the Internet shared folder on your server (from where you
ran Setup.exe). You must be logged in as Administrator or equivalent (or
a staff member with write/change access to that folder). The program
is called Icontrol.exe and has an icon that looks like this:  Double clicking that icon will display the following screen:
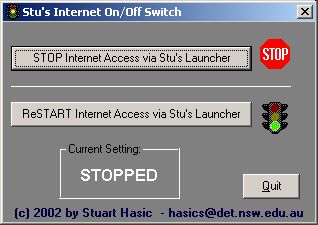
The Current Setting box will normally show "RUNNING", but can be set to "STOPPED" by simply clicking the top button. You can restart Internet access using the second button. Choose the desired setting, then click the Quit button. If you have selected the Stop button, any user who tries to access the Internet via the Browser Launcher will be faced with the following message:

Once you restart access using the On/Off Switch utility, users can access the Internet again after agreeing to the usual message. Remember however, that any user who already had their browser started when you "stopped" Internet access, will not be affected and can continue to use the Internet. However, if they close their browser, they will not be able to re-open it until you have restarted Internet access using the switch utility.
Frequently Asked Questions (FAQ):
Q: What versions of Windows
does the Internet Browser Launcher work with?
A: All 32-bit versions from Windows 95 through to Windows XP. It
is not compatible with Windows 3.x. Before you ask, there is no Macintosh
version available.
Q: Is it possible to perform
a server-based installation "quietly" (i.e. not ask any questions of
the user) - from a login script?
A: Yes it is. You must first have run the Setup program when logged
in as administrator, defined the three fields as you wish and Saved
Settings. Once the settings are saved, you can run the Setup.exe from a
login script using the /A command-line parameter - i.e. SETUP.EXE /A -
this will run completely silently when the user logs on and place a new (or
replace) Internet Explorer shortcut on the desktop. You will however still
have to manually delete the other shortcuts to Internet Explorer on each
computer though. This routine can be used whenever you want to change the
message on each computer's Launcher.
Q: I am installing the
Internet Browser Launcher onto all my workstations "quietly" from the
server, but many Windows 98 and older PCs need their Windows Scripting Host
upgraded. The Launcher starts this process, but it's not quiet - it asks
questions of the user. Is there a way to run the Windows Scripting Host
quietly as well?
A: Yes, there is, but you will have to run it before you run the
Launcher setup. The Windows Scripting Host installation program is called
SCR56EN.EXE and can be found in the same folder as the Launcher setup
program. You can run SCR56EN.EXE /Q to install the scripting host
upgrade quietly. It will ask for a reboot however, which will have to be
acknowledged by the user. Once the scripting host upgrade has occurred on
these older PCs, the Launcher Install can be performed quietly as many times as
you like on each PC.
Q: Some of our computers run
Netscape Navigator or Communicator instead of Internet Explorer. Can they
use the Browser Launcher?
A: Of course they can. The Browser Launcher launches the DEFAULT
browser on each computer. But the standard icon it creates is the
"blue e" for Internet Explorer. All you need to do is
right-click that shortcut, choose Properties, then click the Change Icon button
in the Shortcut tab. Click Browse and look for the Netscape Communicator
icon in the Netscape folder in Program files. Finally, rename the shortcut
from Internet Explorer to Netscape Communicator. Of course, you then have
to delete all other shortcuts to Netscape Communicator.
Q: Our school would like to
change the message displayed to the students in the Launcher maybe once each
term to keep it fresh. Can you do this?
A: Yes, just re-run the setup.exe on each computer with a changed
message. The local message will then be updated.
Q: Can we have one message
in the Launcher on student PCs and another message for staff PCs?
A: Absolutely. It's a good idea to install two copies of the Launcher
Installation files on your server (in different folders) - one for
students, one for staff. Define separate messages for both and run the
appropriate setup.exe program for each computer. Their messages will then
be different. Also, you can then selectively turn internet access off for
student computers only, staff computers only, or both.
Q: I think the Browser
Launcher is nice, but does it come in different colours?
A: During development, I considered the extra effort it would take on my
part to code a colour scheme option, but decided that I would have no control
over the wallpaper that people have on their desktops and didn't want the
colours to clash. Therefore, I decided on basic black. It goes with
everything.
Q: Does the Browser Launcher
affect my ability to upgrade versions on Internet Explorer as they are released?
A: Definitely not. The Internet Browser Launcher does not modify
your computer setup in any way. It does not change the Registry and it
doesn't even call the Internet Explorer program directly. You can upgrade
IE as many times as you wish and not affect the Launcher. However,
whenever you upgrade, IE will place a new icon on the Desktop and in the Start
menu that you will need to delete.
Q: Would it be a good idea
to tell students all about the Internet Browser Launcher?
A: Probably not. You should certainly reinforce the fact that
students must use the Internet responsibly, but telling them you can turn the
Internet on and off at will is not a good idea. That way, when they get
the message that "Internet access is currently unavailable", they'll
just accept that this is the case.
Any Other Questions, Comments or Suggestions?:
While I've tried to make the program as simple as I could to understand and document the procedures and features fully, I'm sure there'll still be questions. Firstly, please pay me the courtesy of reading through all of the available documentation thoroughly. If you e-mail me with a question that is covered in the notes, I will simply refer you to them. If it's something that you simply cannot work out, please let me know by e-mailing me your queries, feedback or suggestions. My e-mail address is stu_hasic@yahoo.com
Stu's Internet Browser
Launcher
is a FREE download
for all NSW Government Schools. It is only available for Windows PCs
(c) 2002 by Stuart Hasic